Arduino yun
From Finninday
Contents
Upgrading an Arduino Yun
background
Essentially the task I'm documenting is outlined here: http://linino.org/doku.php?id=wiki:upgradetolininoio
But I'm adding a bit of background that I was missing since this is my first exposure to the Yun. See? I didn't even spell it with the proper accent over the U.
I'm pleased that the Yun has such good documentation:
- http://arduino.cc/en/Guide/ArduinoYun#toc6
- http://playground.arduino.cc/Hardware/Yun#restoring_a_yun
I didn't end up using this sketch, but it included some nice hints about using the stock Serial Terminal in the Arduino IDE
This was the most succinct and useful documentation I found on setting up the tftpd server that is needed for the upgrade
http://www.df.lth.se/~triad/krad/tftpserver.html
environment
- I'm using a Fedora 20 system connected via usb to provide power and access to serial terminal
- The Yun is connected via wired ethernet to a network with a dhcp server providing IP config
- I have an apache server providing binaries for download to the Yun
- I have a tftp server providing binaries for download to the Yun
- I have installed the version of the Arduino IDE (1.5.8 BETA) that is new enough to support the Yun
prep the Yun
- boot the Yun, that is, provide power
- connect ethernet and let dhcp configure
- log in via ssh. I have yun in my /etc/hosts with the IP address provided by dhcp. I'll be doing several of these boards and each time the image changes, the host id changes, so let's not fiddle with those. The default password is doghunter.
ssh -o UserKnownHostsFile=/dev/null -o StrictHostKeyChecking=no root@yun
- download the latest serial terminal to the Yun
root@j17:~# cd /tmp
root@j17:/tmp# wget http://download.linino.org/pkg-bin/serialTerminal.hex
Connecting to download.linino.org (88.198.63.58:80)
serialTerminal.hex   100% |*******************************| 17420   0:00:00 ETA
- install the latest serial terminal on the Yun
root@j17:/tmp# run-avrdude /tmp/serialTerminal.hex

avrdude: AVR device initialized and ready to accept instructions

Reading | ################################################## | 100% 0.01s

avrdude: Device signature = 0x1e9587
avrdude: NOTE: "flash" memory has been specified, an erase cycle will be performed
         To disable this feature, specify the -D option.
avrdude: erasing chip
avrdude: reading input file "0xFF"
avrdude: writing lfuse (1 bytes):

Writing | ################################################## | 100% 0.00s

avrdude: 1 bytes of lfuse written
avrdude: verifying lfuse memory against 0xFF:
avrdude: load data lfuse data from input file 0xFF:
avrdude: input file 0xFF contains 1 bytes
avrdude: reading on-chip lfuse data:

Reading | ################################################## | 100% 0.00s

avrdude: verifying ...
avrdude: 1 bytes of lfuse verified
avrdude: reading input file "0xD8"
avrdude: writing hfuse (1 bytes):

Writing | ################################################## | 100% 0.00s

avrdude: 1 bytes of hfuse written
avrdude: verifying hfuse memory against 0xD8:
avrdude: load data hfuse data from input file 0xD8:
avrdude: input file 0xD8 contains 1 bytes
avrdude: reading on-chip hfuse data:

Reading | ################################################## | 100% 0.00s

avrdude: verifying ...
avrdude: 1 bytes of hfuse verified
avrdude: reading input file "0xFB"
avrdude: writing efuse (1 bytes):

Writing | ################################################## | 100% 0.00s

avrdude: 1 bytes of efuse written
avrdude: verifying efuse memory against 0xFB:
avrdude: load data efuse data from input file 0xFB:
avrdude: input file 0xFB contains 1 bytes
avrdude: reading on-chip efuse data:

Reading | ################################################## | 100% 0.00s

avrdude: verifying ...
avrdude: 1 bytes of efuse verified
avrdude: reading input file "/tmp/serialTerminal.hex"
avrdude: writing flash (6188 bytes):

Writing | ################################################## | 100% 3.61s

avrdude: 6188 bytes of flash written
avrdude: verifying flash memory against /tmp/serialTerminal.hex:
avrdude: load data flash data from input file /tmp/serialTerminal.hex:
avrdude: input file /tmp/serialTerminal.hex contains 6188 bytes
avrdude: reading on-chip flash data:

Reading | ################################################## | 100% 3.37s

avrdude: verifying ...
avrdude: 6188 bytes of flash verified

avrdude: safemode: Fuses OK

avrdude done.  Thank you.
upgrade uboot
- launch the Arduino IDE
- set Tools > Board > Arduino Yun
- set Tools > Port > /dev/ttyACM0
- start Tools > Serial Monitor
- configure Serial Monitor to use New line, 512000 baud
- enter ~2 in the Serial Monitor and get ready to press send
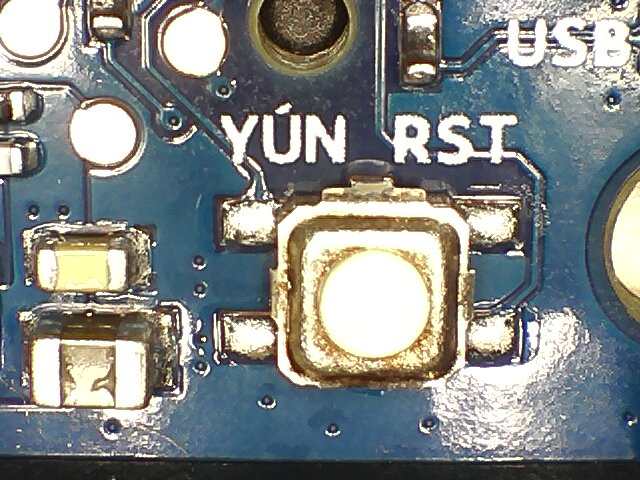
- press the "YUN RST" button
- press send
- within 4 seconds, enter a letter and press send again
- this should pause the boot here:
athrs26_reg_init_lan
ATHRS26: resetting s26
ATHRS26: s26 reset done
eth1 up
eth0, eth1
Hit any key to stop autoboot:  4  3  2  1  0
- the fact that the prompt says "Hit any key to stop autoboot" is an indication that we have the old version
- configure network manually with values that dhcp would have given
ar7240> setenv serverip 10.0.0.5;
ar7240> setenv ipaddr 10.0.0.119;
ar7240> ping 10.0.0.5
dup 1 speed 100
Using eth0 device
host 10.0.0.5 is alive
- transfer the new uboot image
ar7240> tftp 0x8006000 uboot.bin
Using eth0 device
TFTP from server 10.0.0.5; our IP address is 10.0.0.119
Filename 'uboot.bin'.
Load address: 0x8006000
Loading: T T T T T T T T T T
Retry count exceeded; starting again
eth1 link down
FAIL
Using eth0 device
TFTP from server 10.0.0.5; our IP address is 10.0.0.119
Filename 'uboot.bin'.
Load address: 0x8006000
Loading: T T T T ####################################
done
Bytes transferred = 181852 (2c65c hex)
ar7240>
- perform the upgrade
ar7240> erase 0x9f000000 +0x40000
Erase Flash from 0x9f000000 to 0x9f03ffff in Bank # 1
First 0x0 last 0x3 sector size 0x10000
   0    1    2    3
Erased 4 sectors
ar7240>

ar7240> cp.b $fileaddr 0x9f000000 $filesize
Copy to Flash... write addr: 9f000000
done

ar7240> reset
- it now reboots and should have the newer version of uboot
